
All tutorials on this site are copyright protected. They are part of a book that I am currently working on and will publish in the near future.
In order to keep our tutorials simple for this web site, we have kept the verbiage to a minimum There is a lot left up to the viewer to discover. We hope you enjoy these and find them useful.
Glass Painting Tutorial
This is more of a discussion of paints and painting than an actual tutorial, but it is chocked full of useful material to improve your glass output.
Disclaimer:
I am very biased in this area. I feel our paints and enamels are the best in the market. That is why I enterd the business of these products. I researched and tested most paints and enamels available for my own work and wanted to work with the very best available. I feel ours are the very best available.
Basics
One of the most useful techniques for use in small glass fusing is painting the glass. You can use vitreous (glass) enamels and mica based enamels. I do not use Reusche as I find them difficult to control in small areas. Many experienced artist derive excellent results with Reusche, but I do not. I only use powdered enamels mixed with a medium.
Ferro Powders and Kaiser Paints
The most popular vitreous enamels for glass are by Ferro and of course ours. These both come in a variety of basic colors and are quite strongly pigmented. The greens and the blues come out quite dark and need to be “thinned” with white to achieve proper tones for use. As an example, I find Cobalt Blue is a beautiful color, but comes out almost black if used alone. The Kaiser colors do have very strong covering ability. Our enamels are from the Czech republic.
Ferros are only available as powders. Recently they increased their minimums to almost manufacturing levels (minimum 5kg per color) and in addition the product for each order needs to come from Germany.
We now have glass paints (Kaiser Enamel Paints). They are already mixed with a
medium (A-
Porcelain Enamels
In addition to Ferro and Kaiser, there are paints available from 1) Rynne China company and 2) Kathy Peterson’s The Good Stuff. Do not let the word porcelain concern you. It was used as a marketing term many years ago to give a better cache to the product.
These products are more expensive than the ours, and are not quite as well pigmented. The do create lovely colors and the end results are quite acceptable. They come in a very wide expanse of colors.. This can create a problem purchasing your pallet of colors. Note that you need to order a few at a time to determine their results on fusing.. They too darken when fused and often slightly change shades in fusing.
Hues 2 Fuse
I recently experimented with the Hues 2 Fuse line. They are advertised as pigments
if you read the propaganda closesly. I fused colors with added Kaiser flux and A-
Other
I have also tried Glassline and Unique enamel paints and do not care for either. That is only my opinion and you are welcome to try them.
Thompson makes a series of dry enamel paints (as opposed to their dry enamels). I find them inferior to the above ones that I now use. In addition I had Thompson grind several glass enamels to a fine powder and found their use to be unsatisfactory.
Micas
Straight Micas in general do not fuse well directly onto glass. They adhere only at the surface where they are in direct contact with the glass, thus the coverage is limited. We have added some very good quality Micas to our store.
We also have some interesting techniques to enhance mica color. We teach these in our Images on Glass Class.
Creating the paints
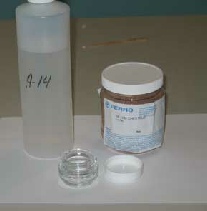
As I said earlier, you can use powder form enamels. To create the paints I use mainly
A-
You can also use a CMC based product (I make my own, but liquid stringer or user
friendly medium are commercial examples) as a mixing medium. I find the A-
If you need an oil based medium, there are several choices, but the main ones are lavender oil and pine oil. Pine oil holds powder extremely well and is a great meduim with which to paint. Unfortunately, it is a pain to clean up and due to this, I have just about abandoned it unless there is a specific situation that calls for it.
Mica Paints
As mentioned earlier, mica does not hold well to glass. Firing straight mica leaves a very thin layer on the surface only where it is in direct contact with the glass. The simple way to overcome this is by mixing in Kaiser Flux (or also called frit) . This material is a lead free very fine glass based product. When mixed in with the mica, the flux encapsulates the mica and adheres to the underlying glass. This works beautifully. It does however dampen the bright mica look somewhat.
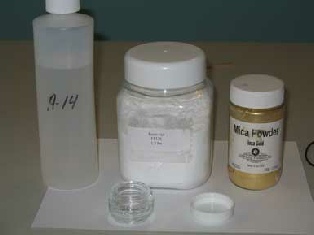
To mix the “Mica Paint” I visually add 2 parts mica with 1 part flux. That is then
liquefied using A-
Using the paints
Using the paints is quite simple Start by simply painting the surface of the glass. Then dry the paint very well. I use a heat lamp. You do need to be careful that you do not boil the medium when you dry as this will create holes and blisters. The piece needs to be thoroughly dry before fusing. Once dry, fuse the piece. I always fuse the painted piece before I use it in combination with other glass. If I try and shortcut this , I end up with bubbles. I use 1400°F as my maturing temperature for all my paints.
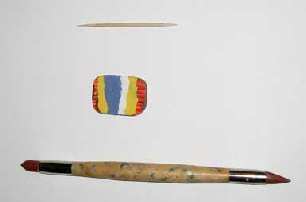
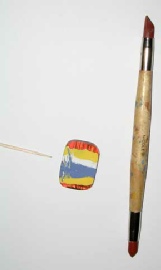
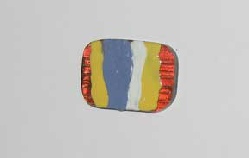
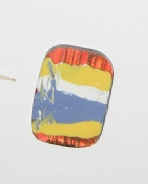
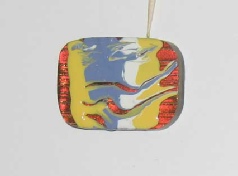
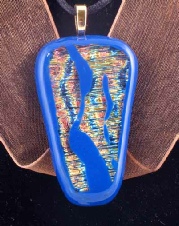
Painted with yellow blue and white, Scratched with toothpick, Scratched with rubber clay shaper.
Base is dichroic glass cab.
Bubbles
We are not a production house. We try and make every piece as clean and exciting as possible. As such we do not worry about doing one or two extra fusings on a piece. When we combine a painted piece with a base (or cap), we try and determine visually if there is any texture caused by the paint. If so, we fuse our next piece using chads in each corner. I always use chads when there is mica involved. A chad is a cube of glass cut to approximately 1/8 inch per side. The exact size of the chad is not important as it will be cold worked (cut or ground) out after firing. The chad causes the top glass to sag in the center causing the air to be pushed from the inside out.
My schedule (and it is gruelingly long)
AFAP (unless piece larger than 2”x2”) to 1050°F hold 10 minutes.
Increase at 100dph to 1260°F and hold for 20 mnutes.
AFAP to 1410°F hold for 12 minutes.
Crash to 960°F, close kiln and cool naturally from there.
Once this is completed I cold work the piece removing all traces of the chads.
Fun and Games with Paint
There are many processes that we use with our paints, and I suggest you look at these we present here as only a starting point. Use your imagination to expand on these and create some new ones of your own.
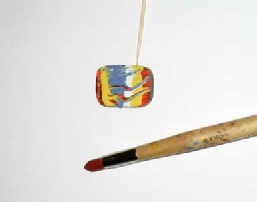
First, we will swirl the paint. Take a cab or a piece of glass and use 2 or 3 colors across the piece. Then take a brush or a toothpick and be creative. Use your artistic instinct to draw swirls, curves and lines through the wet paint. Then dry the piece and fire. This can be used on the final surface of a cab or as an intermediary step.
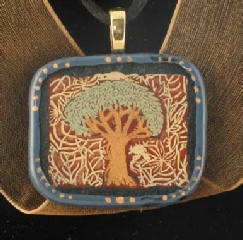
Next project.!! Take a capped cab. Paint the surface with several colors. Then take a rubber tipped clay shaper and drag it across the glass, removing and mixing the paint. This gives a lovely depth to the areas that are cleared of paint. You can see to the layer below the surface layer. There is a tendency for the cleared areas to “heal”. Just repeat the process as the paints dry. I call this wet sgraffito.
You can also execute dry sgraffito (an enameling process of scratching away part of a layer to reveal what is below). Paint the surface and let the paints dry. Then use a knife to scrape away the paint in a pattern or where ever you want. This has 2 disadvantages. First, the paints do not have the flowing look of the wet sgraffito. Second, the dry paint does tend to chip or flake. You may need to reapply paint in some area.
This Tutorial is due an update and will get one soon.All of the information is quite appropriate, but some suppliers have changed.
| Silver metal and glass clay samples |