
All tutorials on this site are copyright protected. They are part of a book that I am currently working on and will publish in the near future.
In order to keep our tutorials simple for this web site, we have kept the verbiage to a minimum There is a lot left up to the viewer to discover. We hope you enjoy these and find them useful.
Applying Decals Tutorial
Decals are becoming very popular for fusing onto glass. There are three kinds. The first is the full color decals you can buy from Harbon or Instar. These are actually highly pigmented glass enamels printed on a carrier and coated to protect them from water. The second is the decals you print yourself on your computer. You use a laser printer that has iron in the toner and the iron oxidizes during the fusion process creating a “sepia” color when cooled. The third is the gold or palladium decals.
(Note: photos are in consecutive order to show how to apply the decals)

Full color Decals
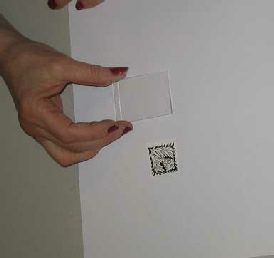
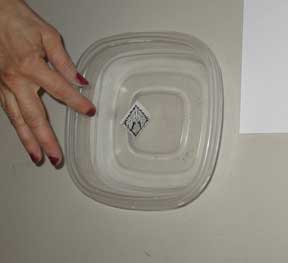
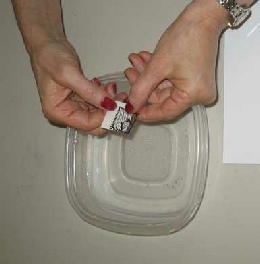
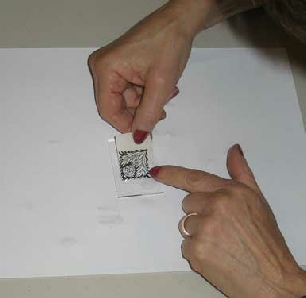
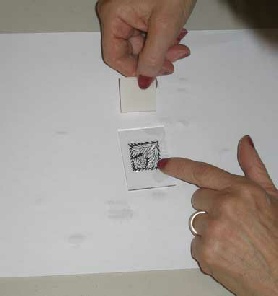
These are quite easy to use. You cut out the decal you are using fairly close to the outline. Extra decal paper just gets in the way. Then drop the decal into water. Wait about 1 minute and see if the decal is loose on the backing paper by carefully trying to slide it abound. If it slides, slide it off the backing on to a piece of glass, with the face up.
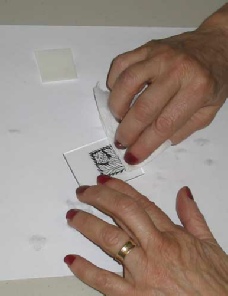
Take a paper towel to gently press the decal to the glass. Make sure the decal is spread out properly. This will wick a good portion of the water off the glass. Now squeegee the decal using a paper towel, working from the center out to the edges. Continue around the decal and squeegee in all directions form the center out. You are trying to get all the air and water out from under the decal. When this is completed, use a hair dryer to dry the decal and glass completely.
Now to fusing: there are 2 kinds of decals. They are glass (low fire) and ceramic (high fire). This is really a misnomer in that the ceramic (high fire) are usually preferable to use on glass. The low fire decals are made to be used on glass at low temperatures such that the glass will not slump. Some low fire enamels in the decals can burn out at fusing temperatures. I use only high fire decals.
Fuse the decal topped glass to about 1400°F. This will set the enamels. In the general use of ceramic decals the only thing you have to watch out for is movement of the glass. If you have a thin piece of glass that you full fuse, the decal can spread and break up. Similarly if you cap a decal, and the glass moves (flows) during firing, the decal can break up or distort.
 Gold or Palladium Decals
These are quite easy to use. They apply the exact same way as the full color decals above. These too are available as low and high fire. My experience is that you can treat both as if they are high fire. You fuse them to a minimum of 1325°F. You can fuse them to higher temperatures. In fusing these decals the first time, you need to vent the kiln lid until the temperature is 900°F. I crack the lid of my kiln on one side with a 1 inch thick piece of kiln shelf. Close the kiln lid when that temperature is reached. This allows the organic matter in the kiln to burn off without totally depleting the oxygen in the kiln. The decals need an oxidizing atmosphere to generate the color.
I find that capping these decals is problematic. It seems that the decal is so thin that it easily breaks up when capped. In fact I always do the metal decal as my last fusing step.
Computer Printed Decals
These are the decals you print yourself on a laser printer with iron in the toner. All HP, Apple and most Lexmark printers will work. There are others, but you will need to test for yourself. No inkjet printers work. The coloring agent is the iron turning to iron oxide (rust) during the fusing process.
You need to buy the blank decal paper. Sources include Delphi, Ed Hoy, D&L, Beldecal as well as most glass outlets. This paper has become quite popular, so it is available at lots of glass locations.
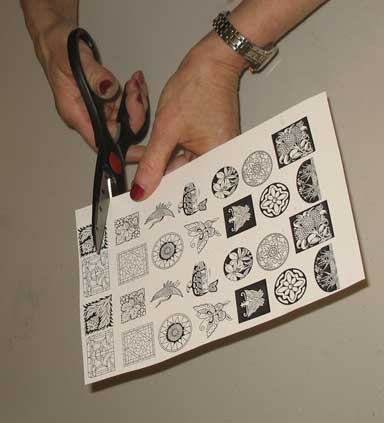
Using your computer, make up your artwork in black and white. There are plenty of desk top publishing
and graphics programs, so I will leave the creation to you. Anything you print on the page will be a decal.
Put a sheet of the decal paper in your printer, making SURE to remove the top protective sheet. That is strictly for protection of the gelatin layer on the decal. You are printing on the side that was protected (it will look shiny). Print the page you have created.
Now I will repeat the application procedure you used for color decals. You cut out the decal you are using fairly close to the outline. Extra decal paper just gets in the way. Then drop the decal into water. Wait about 1 minute and see if the decal is loose on the backing paper by carefully trying to slide it abound. If it slides, slide it off the backing on to a piece of glass, with the face up.
Take a paper towel to gently press the decal to the glass. Make sure the decal is spread out properly. This will wick a good portion of the water off the glass. Now squeegee the decal using a paper towel, working from the center out to the edges. Continue around the decal and squeegee in all directions form the center out. You are trying to get all the air and water out from under the decal. When this is completed, use a hair dryer to dry the decal and glass completely.
Firing these decals is simply taking the glass and decal combination up to 1400°F.
You can fire the decals on colored glass to give it the desired look. Again, the
decal will have a sepia color.
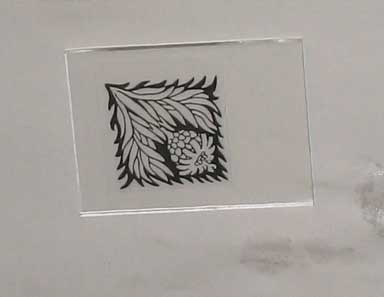
Ready to be fired
| Silver metal and glass clay samples |