
All tutorials on this site are copyright protected. They are part of a book that I am currently working on and will publish in the near future.
In order to keep our tutorials simple for this web site, we have kept the verbiage to a minimum There is a lot left up to the viewer to discover. We hope you enjoy these and find them useful.
Glass Clay
Glass clay is a very functional material to use in creation of glass art. Its uses, some of which I will document later, are numerous, but the main function of glass clay is to give dimension to fused artwork.This tutorial is not meant to give you a finished product. It is designed to give you the tools to make glass clay and to then enough basic information to let you start your creative juices flowing.
I do not claim to be the inventor of glass clay as there have been several people on the west coast also working with this delightful material . I have however done a lot of work on it and learned many tricks and techniques that I feel are unique and quite useful. We in fact have a 2 day class on these techniques and are even considering a second 2 day class for further techniques.
Glass Clay is also fun. Playing with clay has been with most of us since we were children. This process enables us to use our hands to connect with our inner child.....sort of like playing with mud pies and making art out of it.
 .
. 

Making the Clay
You will need :
1) CMC (Carboxymethyl Cellulose
2) Powder frit-
3)Propylene Glycol, Dipropylene Glycol 50/50 mix
Optional other materials
4)Kaiser Flux..optional, but I find it makes the clay far more workable.
Modifiers: Used to modify the consistency of the clay.
5)here are several plasticizers (Polyox, Veegum, Glycerine and several others) that I also use to give the clay a better feel, but what you have is quite acceptable.
Note: I use plasticizers in my clay. I like a clay that is highly workable and it almost emulates modeling clay. Your basic clay without these works well enough to get you going. In fact you can do most things without plasticizers.
Mixing the Clay
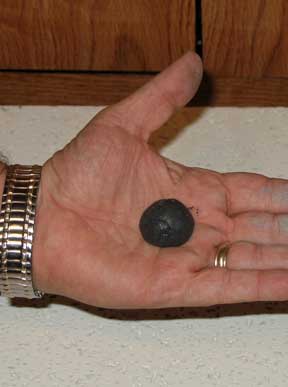
Add 100 grams powder frit and 9 Grams CMC. Mix well.
To this add 70 Grams water. Again, mix well. This will form clumps, much like pie dough.
Add 6 grams of the 50/50 glycol mix. Hand mix this well and your clay is ready. I like to rest my clay for several hours before use.
Molding and sculpting
There are 2 significantly different family of uses for clay. The first is for molding. For this I use the full mix above. I find that we paint or mica our molded pieces so we create a clay that is best suited for molding.
The second type of clay is sculpting. This is clay to be rolled, shaped and carved. It is used without paints or micas on the surface so the color is more critical. This clay I make using only top quality CMC and frit....no flux or plasticizers. The additional materials tend to dampen the color of the clay. Note that all clay products have some air trapped due to the small particle size of the frit. This will change the color of the clay a little. Just learn to accept that. Also, if the clay is underfired, it will gray up a little.
Simple uses:
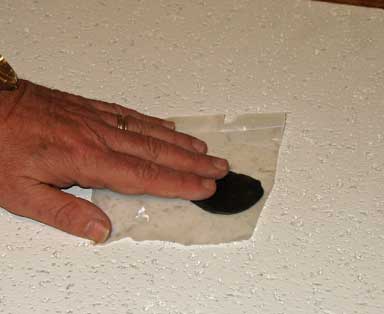
Put some clay on a piece of wax paper and pat down until it is about 1/4 inch thick. Cut strips using a razor or preferably a clay cutter. You will note that the strips will heal slightly . As long as the healing is slight, that is fine. If it heals almost completely, your clay is too moist and you need to add more powder.
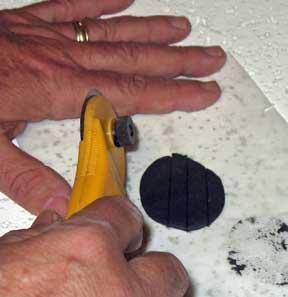
Let the clay dry thoroughly. I do so under a heat lamp . Once dry, you can peel off the wax paper and break the clay strips apart.
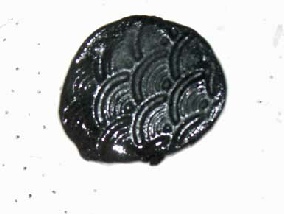
Do the same thing with a cookie cutter. Cut a heart or circle and let dry. You can clean the excess clay from around the cookie cutter before it is removed, but if you don’t, the piece can still be broken out when dry.
You can now start to see the wide range of possibilities for this clay. You can go to the cooking section of your craft store and buy supplies to work fondant (icing). You can cut squiggles, or cut all kinds of shapes using a blade and your imagination.
Adding texture
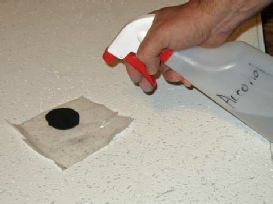
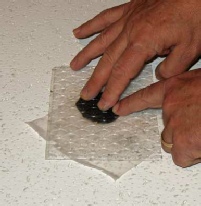
Spread out some clay on a wax paper sheet. Spray the surface of the clay with some denatured alcohol, just enough to wet the surface. Do not saturate the clay. The alcohol acts as a separator. Immediately press in a texture sheet or rubber stamp and then remove. Blow on the clay to evaporate the alcohol. You may then cut out a design from the clay. Dry and work the clay as you wish.
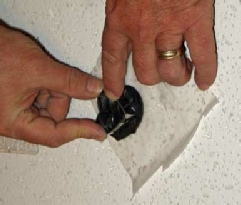
Fusing the Clay
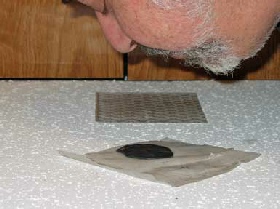
Put your dried clay pieces on a thinfire or kilnwashed shelf and fire to 1390°F for 10 minutes. You do not need to be gentle on the ramping if the pieces are small. Go AFAP. Kilns vary widely, and the glass clay is very sensitive to over firing. You will probably need to adjust your schedule to reflect the realities of your kiln. If you over fire, you loose detail or at worst melt the piece. For sculpting clay which you need better color control, you can hold for 20 minutes at 1050°F before going to the top temperature. This allows the organics to burn off better and lessen their impact on the color.
Note: I have side firing kilns. I find our top firing kiln more difficult to control for clay. It still can be done, just with a little more attention.
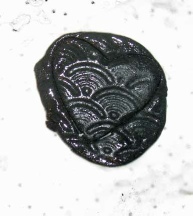
Once fired the pieces are usually small enough that they can be cooled quite rapidly. The pieces are usually reduced in size by about a third, but no details are lost, in fact the reduction in size seems to enhance the detail.
More Uses
This material is highly functional. There are too many uses to list here. I teach a 2 day class on the uses of Glass Clay and am considering a second 2 day class for further uses.
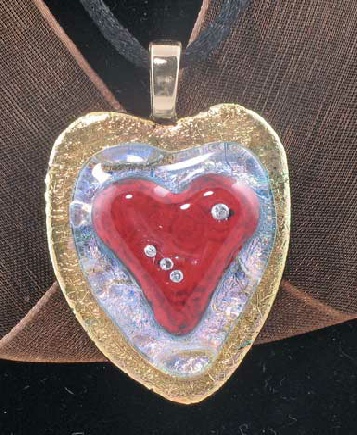
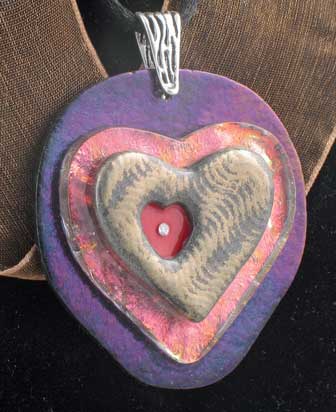
Experiment with it and you will find it easy to come up with ideas. Just look at the page in this site with pendants and earrings we have made with Glass Clay. That should give you some ideas about where to start.
| Silver metal and glass clay samples |