
All tutorials on this site are copyright protected. They are part of a book that I am currently working on and will publish in the near future.
In order to keep our tutorials simple for this web site, we have kept the verbiage to a minimum There is a lot left up to the viewer to discover. We hope you enjoy these and find them useful.
Using Foil Tutorial
Foil enhancement of glass pendants
Ever since I started fusing I found that people wanted to add foil to their glass. The beauty and contrast of glass and foil makes an excellent artistic statement.
There are several ways of adding foil to glass and fusing the foil in place. This process is limited mainly to silver, gold and copper. These foils can withstand fusing temperatures. Aluminum based foils will not withstand the temperatures required for fusing glass.
The first question is why would one want to use aluminum based foils with glass.
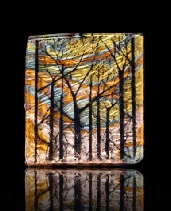
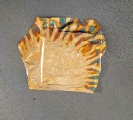
Aluminum based foils can be quite beautiful by themselves. They can be designed with
striking patterns often surpassing dichroic glass in their beauty. In fact aluminum
based foils can also be created to emulate gold and silver quite well. The feathered
color-
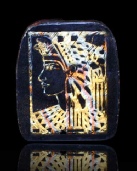
 One series of foils is available under the Mona Lisa trade name. Many of these can
be found at craft stores such as Michaels or AC Moore. Also, Sepp Leaf in New York
carries a similar series of foils. Again, the patterns and color selection are quite
beautiful.
One series of foils is available under the Mona Lisa trade name. Many of these can
be found at craft stores such as Michaels or AC Moore. Also, Sepp Leaf in New York
carries a similar series of foils. Again, the patterns and color selection are quite
beautiful.
So how do we add aluminum foils to fused glass. We have already said that they cannot be fused into the glass. How can we utilize these beautiful material in our fused glass.
Our answer is to use epoxies. Epoxies can be purchased that are water clear and stable under UV exposure (sunlight). But there are a huge amount of epoxies out there. So which one? We use a product called doming epoxies. You can search the net and find many suppliers of doming epoxies . These are epoxies that are clear and UV stabilized to remain clear. They also cure easily in small amounts. Their intended use is as a coating for pins or small jewelry. Surface tension domes the material, thus the name.
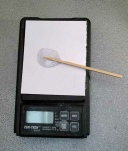
 Doming resin is a 2 part epoxy It needs to be weighed and mixed according to instructions
just before its use. We use a gram scale and mix small amounts by weight according
to the required ratio of the epoxy. We put a piece of index card stock on the scale.
Then we add by weight equal amounts (our epoxy uses that) of each part. That is mixed
with a toothpick and is ready for use. The pot life is at least an hour at room temperature,
so there is no reason to rush.
Doming resin is a 2 part epoxy It needs to be weighed and mixed according to instructions
just before its use. We use a gram scale and mix small amounts by weight according
to the required ratio of the epoxy. We put a piece of index card stock on the scale.
Then we add by weight equal amounts (our epoxy uses that) of each part. That is mixed
with a toothpick and is ready for use. The pot life is at least an hour at room temperature,
so there is no reason to rush.
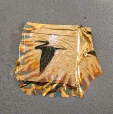
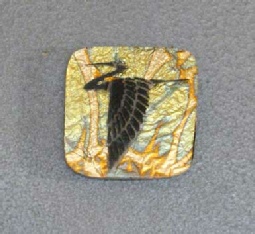
We start our process by doing all the decoration and fusing that we need to do. For many of our pieces that means to screen print or paint a design on a piece of 2mm clear glass and fuse it to make the design permanent. In our example here we use a flying stork design fused into a piece of clear glass/
We then select a base piece for a backing. This can simply be a black piece of 2
or 3 mm glass. It can also be a clear piece if you wish the foil to be seen from
the back. This piece is lightly coated with an even coat of the doming resin (prepared
as above). Then a pre-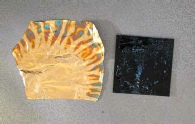 capping glass to spread the resin. This takes some practice such that
the resin spreads across the entire piece.
capping glass to spread the resin. This takes some practice such that
the resin spreads across the entire piece.
Note: handling the very thin foil takes a little practice. Cutting with a razor will shred it. To cut it you need to put it between 2 pieces of paper and use some sharp scissors. Also, placing it can be tricky. To your benefit, it can be gently slid around if it is not exactly placed where you want it.
We then place the decorated piece of glass on top of this sandwich and gently squeeze. The epoxy will squeeze out of the sandwich. Be careful to remove the excess epoxy with a paper towel. Squeeze until the layers meet.
There will be enough epoxy between the layers to do its job. Now let the epoxy cure. We leave it overnight under a hot lamp. If done correctly, you will have what looks like a solid piece of glass.
Now comes the part that limits the process somewhat. You need to grind the piece
to size and then polish it. The piece cannot be fire polished. We are fortunate enough
to have lapidary equipment, but the process can be done by hand. The epoxied piece
quite easily withstands the cold working process.
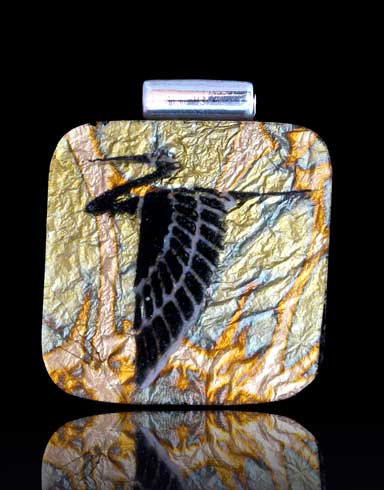
You are done. Your piece can look quite professional and will have the look and feel of glass. The process can also be used with slivers or shapes of foil as you see fit. We have used punches to punch out leaves and other designs to emblish our pieces. We have also done abstracts using multiple pieces of cut foil. But we consistenly come back to our first love...screen printed designs.
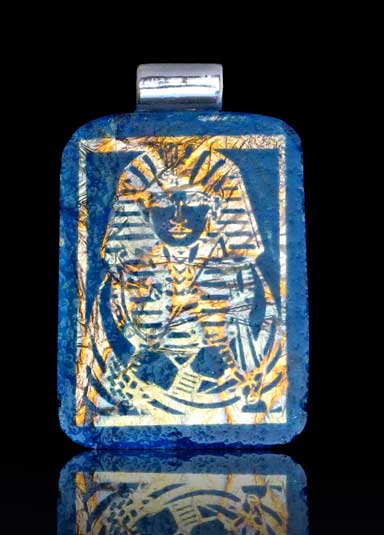
| Silver metal and glass clay samples |