
All tutorials on this site are copyright protected. They are part of a book that I am currently working on and will publish in the near future.
In order to keep our tutorials simple for this web site, we have kept the verbiage to a minimum There is a lot left up to the viewer to discover. We hope you enjoy these and find them useful.
Using RTV Silicone for making molds.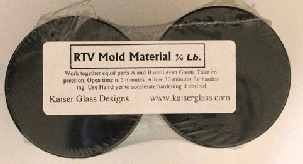
RTV is shorthand for “room temperature vulcanization”. Simplified, it means taking a silicone material (it can be two parts or one part) and creating a flexible, but solid mold. The entire process takes place at (what else) room temperature.
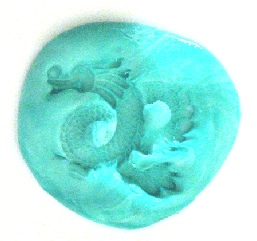
There are a myriad of uses for this material, but our main use is to create glass clay molds from many different originals. You can uses charms, pendants, and even sticks or walnuts as the original. Just about anything your little heart desires. The RTV silicone picks up fantastic detail from the original.
Our RTV silicon comes in a ¼ lb package. It is a 2 part material and is used in a
ratio of 1:1, meaning one part of white and an equal amount of green.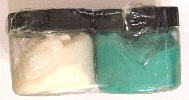
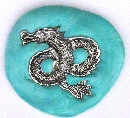
To make a mold, select your original first. Multiple originals can be used as long as you have enough material to create the mold of all of them. Note: select your originals before you start mixing the material. You do not want to have your material mixed and then start dawdling around thinking of what to put in the mold material. The open time (before the material starts to set up) is 4 minutes. That is plenty of time for the process, but does run out if you are not prepared.
Mixing the RTV material
 Next, take 2 equal parts of the material. You can just eyeball equal parts. It is
not critical that the measurement be exact. You do not have to use all of the material
in the jars. Just use what you estimate is the correct amount. The remainder will
store well in the jars.
Next, take 2 equal parts of the material. You can just eyeball equal parts. It is
not critical that the measurement be exact. You do not have to use all of the material
in the jars. Just use what you estimate is the correct amount. The remainder will
store well in the jars.
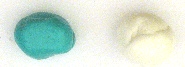
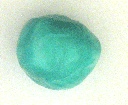 Knead the 2 parts together until you get a consistent green color. I usually flatten
out each ball then combine the materials one on top of the other and then keep folding
the blob until I get a fairly consistent green. You can have a few light whitish
areas, but no solid white (or solid dark green).
Knead the 2 parts together until you get a consistent green color. I usually flatten
out each ball then combine the materials one on top of the other and then keep folding
the blob until I get a fairly consistent green. You can have a few light whitish
areas, but no solid white (or solid dark green).
Pressing the mold
 Once this is done, lay your ball of mixed material on a smooth surface. I usually
use a plastic sheet.or laminate counter top. Flatten the ball until is is about ¼
to ½ inch thick. Then press the original into the mold material face down (obviously).
Remember not to take too much time. If you mess up the pressing of the mold into
the material, you can redo it as long as you have time left. Four minutes is really
longer than you think.
Once this is done, lay your ball of mixed material on a smooth surface. I usually
use a plastic sheet.or laminate counter top. Flatten the ball until is is about ¼
to ½ inch thick. Then press the original into the mold material face down (obviously).
Remember not to take too much time. If you mess up the pressing of the mold into
the material, you can redo it as long as you have time left. Four minutes is really
longer than you think.
 When pressing the original into the mold material, do not press rapidly or the material
might flow outward. If it does this, you can gently press the material back to the
original.
When pressing the original into the mold material, do not press rapidly or the material
might flow outward. If it does this, you can gently press the material back to the
original.
 Next, you wait until the mold is done, usually about 7-
Now wait a half hour before you actually use the mold. This is because the mold is still curing even though it is hard enough. It is still degassing as it completes curing. Your clay will have pits where the gas is leaving the RTV material.
As I said earlier, this material has a myriad of uses, not just for glass clay. It is great for polymer.
clay, moulding, or even chocolate. It is stable to 300˜F.
| Silver metal and glass clay samples |