
All tutorials on this site are copyright protected. They are part of a book that I am currently working on and will publish in the near future.
In order to keep our tutorials simple for this web site, we have kept the verbiage to a minimum There is a lot left up to the viewer to discover. We hope you enjoy these and find them useful.
Kaiser’s Pendant Display
How to make a functional and attractive
display for your pendants
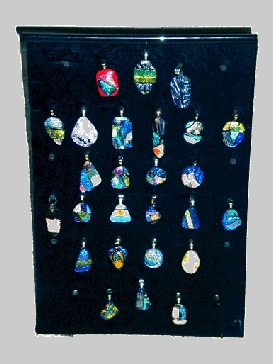
Kaiser’s Pendant Display My wife and I have done the arts and craft show circuit for many years. We sold glass jewelry. Displaying our pendants was always the most challenging part of creating an attractive and functional booth. There was always the trade off between security, shop ability and convenience. About 2 years ago I developed a display that was easy to set up and very functional at the show. I will take credit for this since I have not seen another similar display.
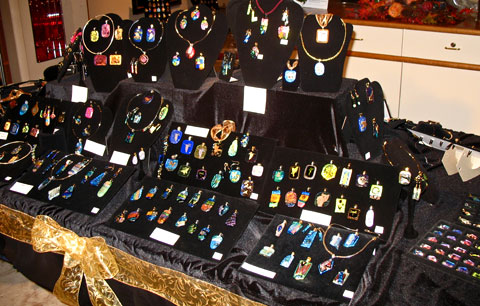
These boards are functional for any type of pendants, metal clay, boro glass, polymer clay, etc etc. This display is easy to set up and easy to use. We have several mirrors in our booth. We find many customers want to take the pendant from the display and look at it in the mirror. The customer can remove a pendant from this display to look at it, but it is not too easy to do so. Since using these displays our pilferage rate has gone way down. It is quite easy to replace the pendant in the board. The pendant is secure, but accessible
First of all I use gator board (a product of Champion Paper) as the structural backbone. I tried foam core or foam board, but found that it did not have the durability to be used. It tended to ding and chip at the least handling and did not last through one show. The Gator board display lasts many shows. It still needs to be handled with respect, but it can last many shows easily.
I cut a 12 x 18 inch piece of gator board and use 150 grit sandpaper to roughen one side. Then layout a piece of cloth, larger than 12x18 on a flat surface. The side you want showing is placed face down. We use black velvet, but any cloth you prefer is usable. Then spray that roughened side with a heavy duty spray adhesive such as 3M Super 77. There are other similar adhesives, but it is important to use a heavy duty adhesive. The cut and sprayed board is then placed on the fabric and pressed down hard to get the adhesive to stick well to the cloth. Let the piece dry for about 5 minutes. At that point, with the board laying face down, cut around the board. You now have a 12x18 piece of gator foam with one side fabric.
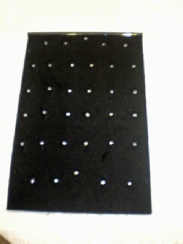 Lay the board, cloth side up on a table and lay out your pendants in any manner
you want. You can be as creative as you wish. This is where you can create patterns
or categories, or any layout you feel will be pleasing to the shopper and best present
your pendants. Your unattached pendants should now be layed out on the board. Lift
each one individually and place some small mark on the board where that pendant’s
bail rests. We use white chalk, but any visible marker is okay. One time we used
Testors white model paint because that is what we had readily available. You can
remove the pendant as you mark its bail.
At this point you should have the fabric gator board with a series of marks all over it. This is where you learn secret number one. Lay the board face up on a surface you do not care for. It is going to get some abuse. Do not put it on concrete. At each mark use a 5/16 hollow punch and smack a hole in the board with a hammer. You can find hollow punches at any hardware store (or Harbor Freight). Continue and punch holes at every mark. You now have the background ready for your display.
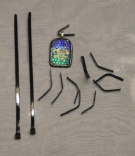 This is where secret number 2 comes into play. Find some black plastic wire ties
at your
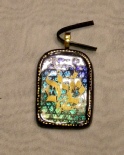 local hardware store. These are the things electricians use to tie bundles
of wires together. They insert one end into a slot on the other end and pull and
it tightens up and will not let loose. Cut the wire ties into strips 1.5 to 2 inches
long. They are easy to cut with sharp scissors. Each of these small strips is an
attachment for a bail. Bend the strip in half *into a U shape) with the bail in the
middle. Pressing the two ends together, slide it into a hole in the gator board.
Voila, the plastic memory of the strip makes it hold tight into the hole. We find
the black colored strip virtually disappears.
Before you put all the pendants on the board, there is one more thing to consider. That is how will it be used. Will it hang, or do you want to stand it up? For the hanging board, we put two more holes, one on each side of the top of the board. Those can be used to attach hanger hooks (also available at any hardware store). For easel backs, it is a little more complicated.
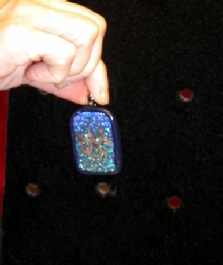
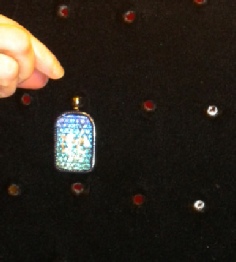
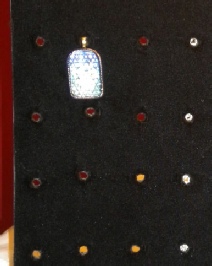
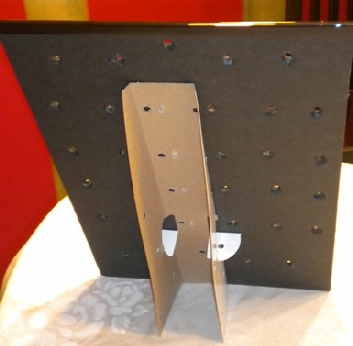
We attach the cardboard easel (a local office supply store should have these) to
the back of the board. It is necessary to go back with the hole punch and punch out
the cardboard where visible through the holes. This is necessary since the plastic
hangers will not be able to go all the way through if you do not punch it out. Once
done, your display is ready. We fill our displays at our studio and organize the
entire display before we go to a show. Once there, we just set up the large fixtures,
place our filled displays at pre-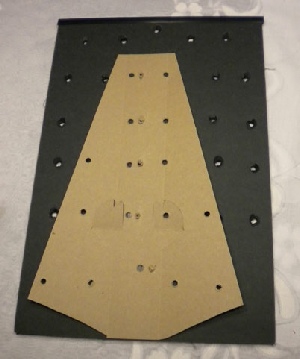
But wait, that’s not all!!
How about Earrings
Once we developed the pendant display, it was a quick step to develop the earring version. We decided to drill holes and put the french hook backings of the earrings through the holes. Initially we tried the gator board, but found it too thick for the earring backings. We then used the velvet pads available from display fixture retailers and found they worked beautifully. You need to have a larger hole than you would think to allow the earring clearance in entering the hole. We find that quarter inch is a good size.
Again, you then need to consider method of showing the display. Do you want it hung or do you want it standing up. Either can be accomplished similar to the pendant method. We lay out the holes in a pleasing pattern and fill the display in a pattern of our choice.
We first break down our display by metal (either Sterling Silver or Gold Filled).
Then we further separate by color. Again, we find the display very easy to shop and
athe earrings can be removed so the customer can look at them in the mirror. Ninety
nine percent of women seem to want to do this when they buy their earrings.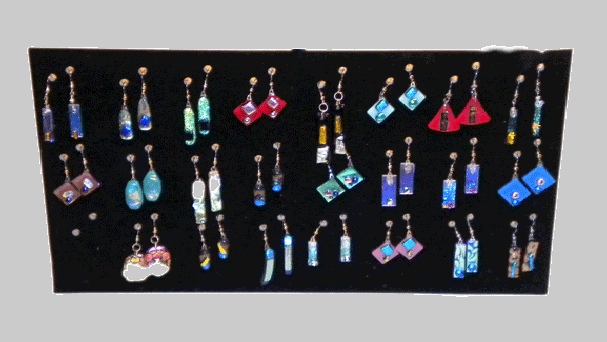

| Silver metal and glass clay samples |